
A practical guide
How to annotate a screenshot on a Mac.
Your Mac can already add arrows, text, boxes, and a signature to a screenshot, with nothing to install. Here’s how to use those free Markup tools, where to find them, and a faster way if you mark up screenshots every day.
- Right after you take it
- A saved screenshot
- What each tool does
- Without saving a file
- Where’s Markup?
- If you do it every day
1. Right after you take it: click the thumbnail
Free and built in. The quickest way for one screenshot.
- Press ⌘⇧4 and drag across what you want, or press ⌘⇧3 for the whole screen.
- A small thumbnail of the screenshot appears in the corner of the screen for a few seconds. Click it.
- The screenshot opens in a Markup window. Use the toolbar at the top to add arrows, boxes, text, and drawings. Here’s what each tool does.
- Click Done to save it, or click the Share button to send it to Messages, Mail, or AirDrop.
No thumbnail? Press ⌘⇧5, click Options, and turn on Show Floating Thumbnail.
2. A screenshot you saved earlier: use Preview
Free and built in. Good for screenshots already on your Desktop.
- Open the screenshot in Preview: double-click it, or Control-click it and choose Open With → Preview.
- Click the Show Markup Toolbar button (a pen tip in a circle), or choose View → Show Markup Toolbar (⇧⌘A).
- Add your marks, then choose File → Save.
Once you save, the marks become part of the picture, and you can’t move or remove them later. If you might need the clean version, choose File → Duplicate first and mark up the copy.
What each Markup tool does
- Arrows, boxes, and circles. Click Shapes and pick one. Drag the blue handles to resize it. Shape Style changes the line, and Border Color changes its color.
- Text. Click the Text button, type, and drag the box into place. Text Style changes the font, size, and color.
- One spot that matters. In Shapes, Highlight dims everything around the area you choose, and Loupe magnifies a small detail.
- Freehand. Sketch turns a rough circle or arrow into a neat shape. Draw keeps your line as you drew it; it appears on Macs with a Force Touch trackpad.
- Crop. Trim the screenshot to the part that matters. A tight screenshot is much easier to read on a phone.
- Sign. Add a saved signature, for forms.
To cover a password or an account number, draw a rectangle and set its Fill Color to a solid color. Markup has no blur tool. See how to blur or hide part of a screenshot on a Mac for the safe way to do it.
How to mark up a screenshot without saving it
Click the thumbnail, add your marks, then click Share and send it. Then click the Trash button in the same window. The screenshot goes out, and no file is left on your Desktop.
Where’s Markup on a Mac?
Markup isn’t an app you open on its own. It’s built into other places:
- The window that opens when you click a screenshot’s thumbnail.
- Preview: the pen-tip button, or ⇧⌘A.
- Quick Look: select a file in Finder, press Space, then click the Markup button.
- Finder: Control-click an image and choose Quick Actions → Markup.
- Mail, Notes, and Photos, when you edit an image there.
If you mark up screenshots every day: SnapTrellis
Free to download. Capturing, markup, and copying single screenshots are always included.
- Press ⌥⇧4 and drag. The screenshot is copied right away, and a small card appears beside it.
- Click Mark Up on the card. Most tools have a one-key shortcut: T text, A arrow, R rectangle, O oval, H highlight, B blur, X hide, and C crop. Select anything you added and press Delete to remove it.
- To point at a detail, press M and click it. A lettered marker (A, B, C…) appears, with a dot on the exact spot and a thin line to its letter. Type its note right there.
- Click Copy or Share in the Tools panel. Marker notes are listed under the screenshot, in type that’s easy to read on a phone.
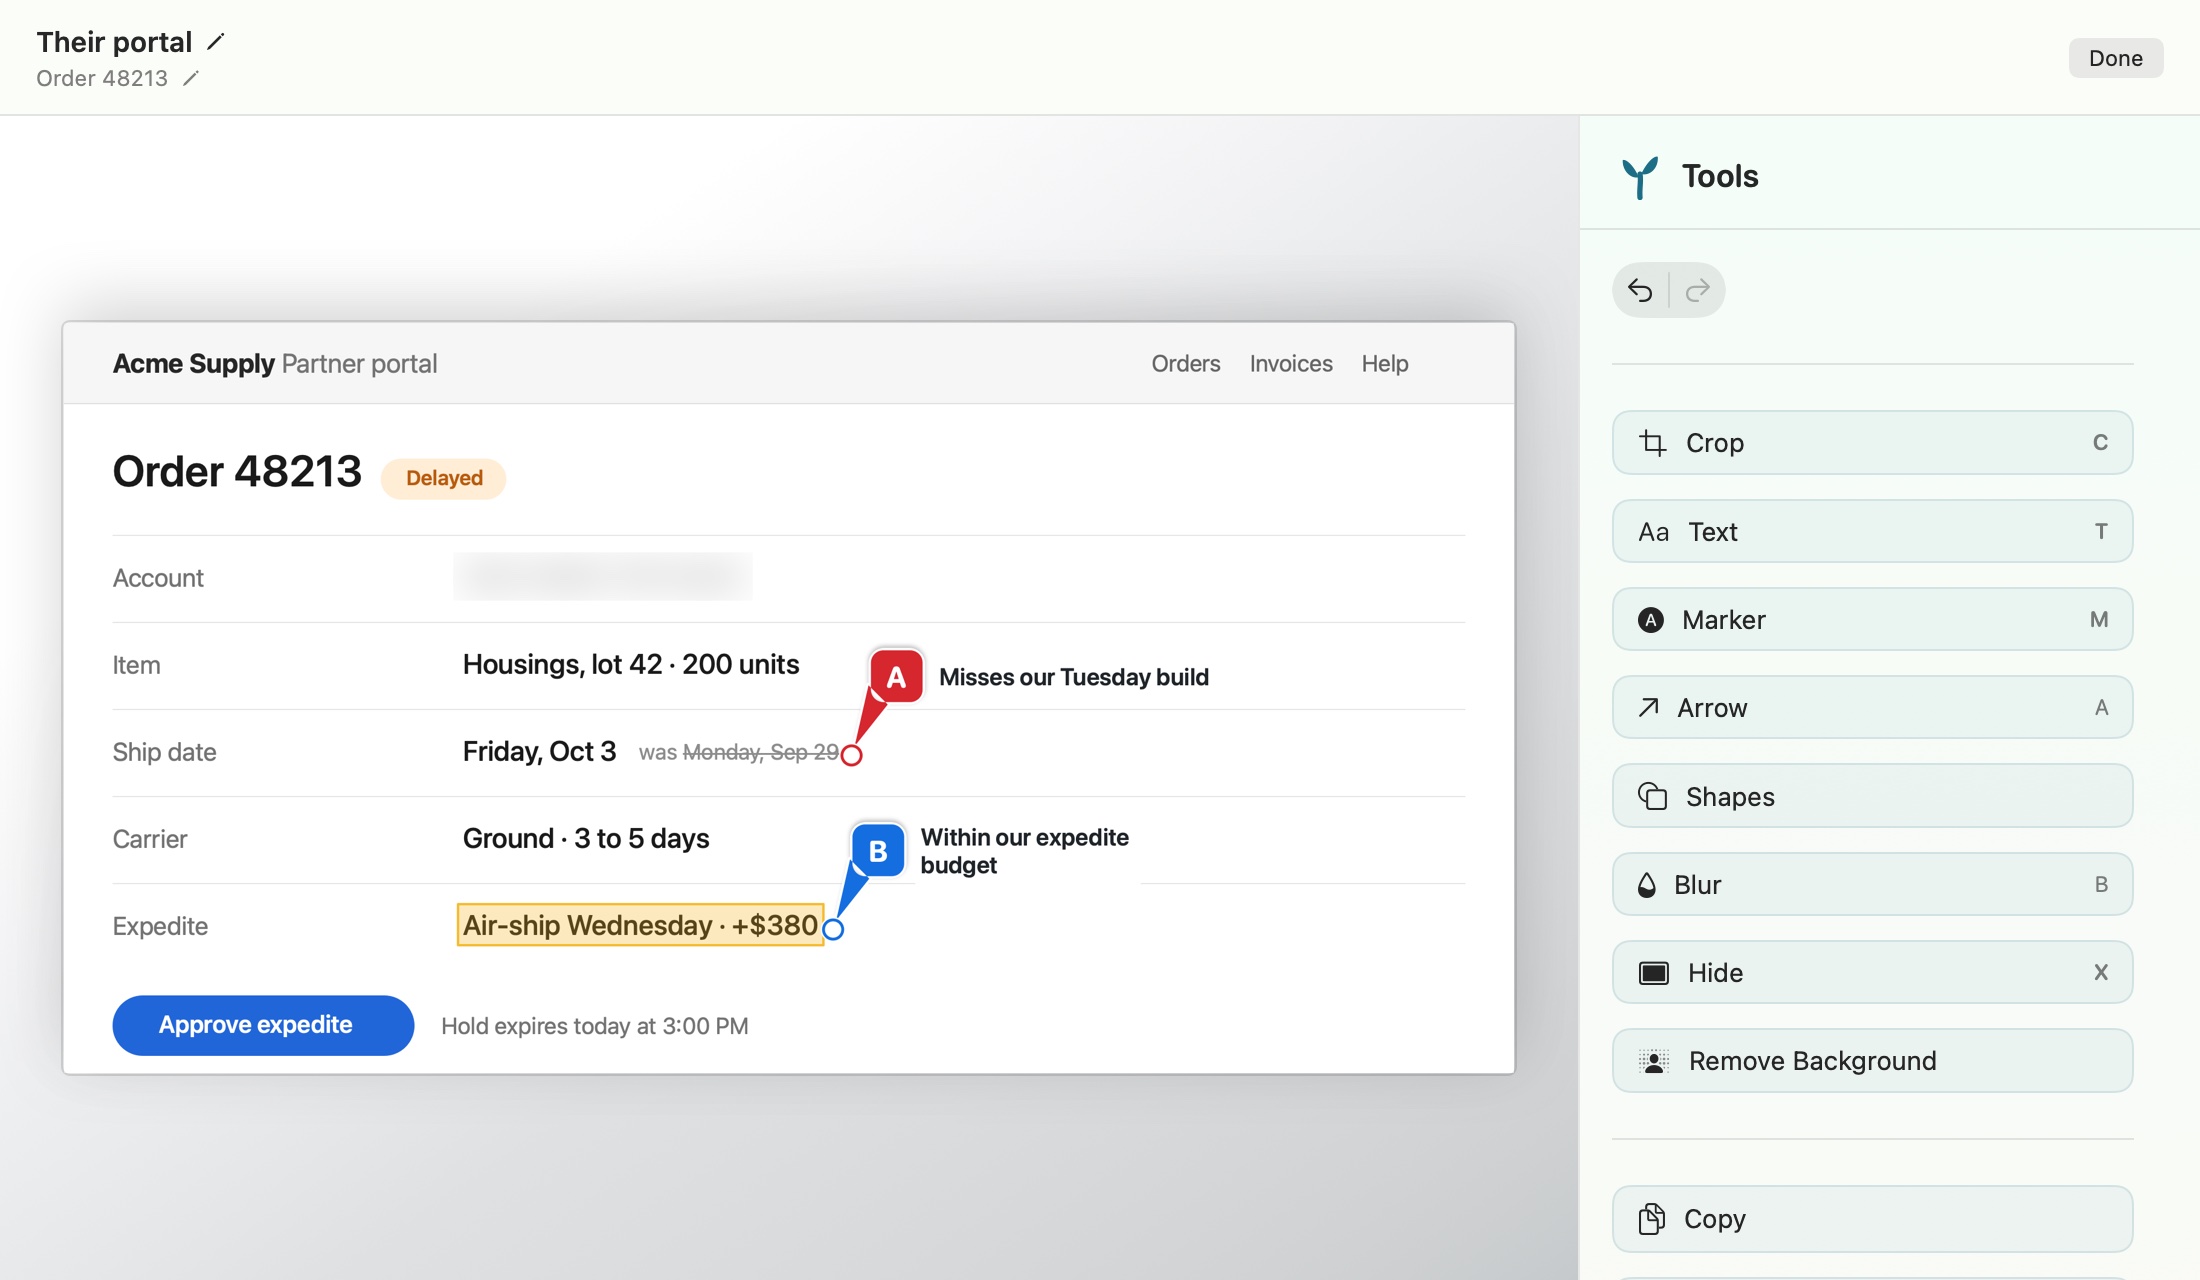
What it adds to Markup: one-key tools, a blur tool (Markup has none), notes that travel with the screenshot, and a group that keeps related screenshots together so you can send them as one image. The trade-offs: it’s another app to learn, and merging a group into one image is free for 14 days, then $19.99 once.
Which should you use?
For a screenshot now and then, the Mac’s Markup tools are free and good. If you mark up and send screenshots every day, to a client, a team, or a supplier, SnapTrellis saves the steps each time.
Sending several marked-up screenshots? See 3 ways to combine screenshots on a Mac. Writing a how-to for someone? See how to make step-by-step instructions with screenshots.
Free to download. Markup and single screenshots are always included; merging a group is free for 14 days, then $19.99 once. No subscription. macOS 14 or later.