
A practical guide
How to copy a screenshot to the clipboard on a Mac.
Add one key to the usual shortcut, and your Mac copies the screenshot instead of saving a file, ready to paste into a message or a document. Here’s how, how to make it automatic, what to do when it won’t paste, and how to copy every screenshot and still keep it.
1. Add Control to the shortcut
Free and built in. Nothing is saved to your Desktop.
| ⌃⇧⌘4 | Copy an area: drag across what you want |
|---|---|
| ⌃⇧⌘3 | Copy the whole screen |
| ⌃⇧⌘4, then Space | Copy one window: click the window you want |
Then click where you want the screenshot, in a message, an email, or a document, and press ⌘V to paste it. The trick is to hold Control (⌃) along with the keys you already use.
2. Make the clipboard the default
Free and built in. Good if you never want screenshot files.
- Press ⌘⇧5 to open the Screenshot toolbar.
- Click Options, and under Save to, choose Clipboard.
- From now on, your screenshots are copied instead of saved. To switch back, choose Desktop or another folder in the same menu.
The catch: a screenshot that’s only on the clipboard isn’t saved anywhere. Copy something else, and it’s gone, unless your Mac keeps a clipboard history.
Already took the screenshot?
- The thumbnail is still in the corner: Control-click it and choose Save to Clipboard. Or drag the thumbnail straight into a message, an email, or a document.
- It’s saved as a file: open it in Preview, press ⌘A to select it all, then ⌘C to copy it.
Why won’t my screenshot paste?
- It was saved, not copied. Without Control, the shortcut saves a file. Look on your Desktop, or in the folder chosen under Options → Save to.
- Something else was copied since. The clipboard holds one thing at a time.
- That spot doesn’t take pictures. Some fields accept only text. Try pasting into Messages, Mail, Notes, or a document.
- You’re pasting on your iPhone or iPad. Universal Clipboard needs both devices nearby and signed in to the same Apple Account, with Wi-Fi, Bluetooth, and Handoff turned on. The copy is only there for a short time.
Get back an earlier copy: Clipboard history
On macOS Tahoe 26 and later, Spotlight can keep a clipboard history, including images. Press ⌘Space, then ⌘4 to see it. The first time, your Mac may ask whether to allow Clipboard results; click Allow. Items are kept for a limited time, eight hours by default, and from macOS 26.1 you can change that in System Settings → Spotlight.
3. Copy every screenshot, and keep it: SnapTrellis
Free to download. Capturing and copying single screenshots are always included.
- Press ⌥⇧4 and drag, or ⌥⇧3 for the full screen. The screenshot is copied right away, ready to paste with ⌘V.
- It’s also kept in a group in the Trellis, a small panel at the edge of your screen, not as a file on your Desktop. Copied something else since? Right-click the screenshot and choose Copy.
- Need a lighter file for email or chat? Right-click and choose Copy Smaller to copy it at 75, 50, or 25 percent.
- Took several? ⌥⇧C copies the whole group as one numbered image. Merging is free for 14 days, then part of the $19.99 one-time unlock.
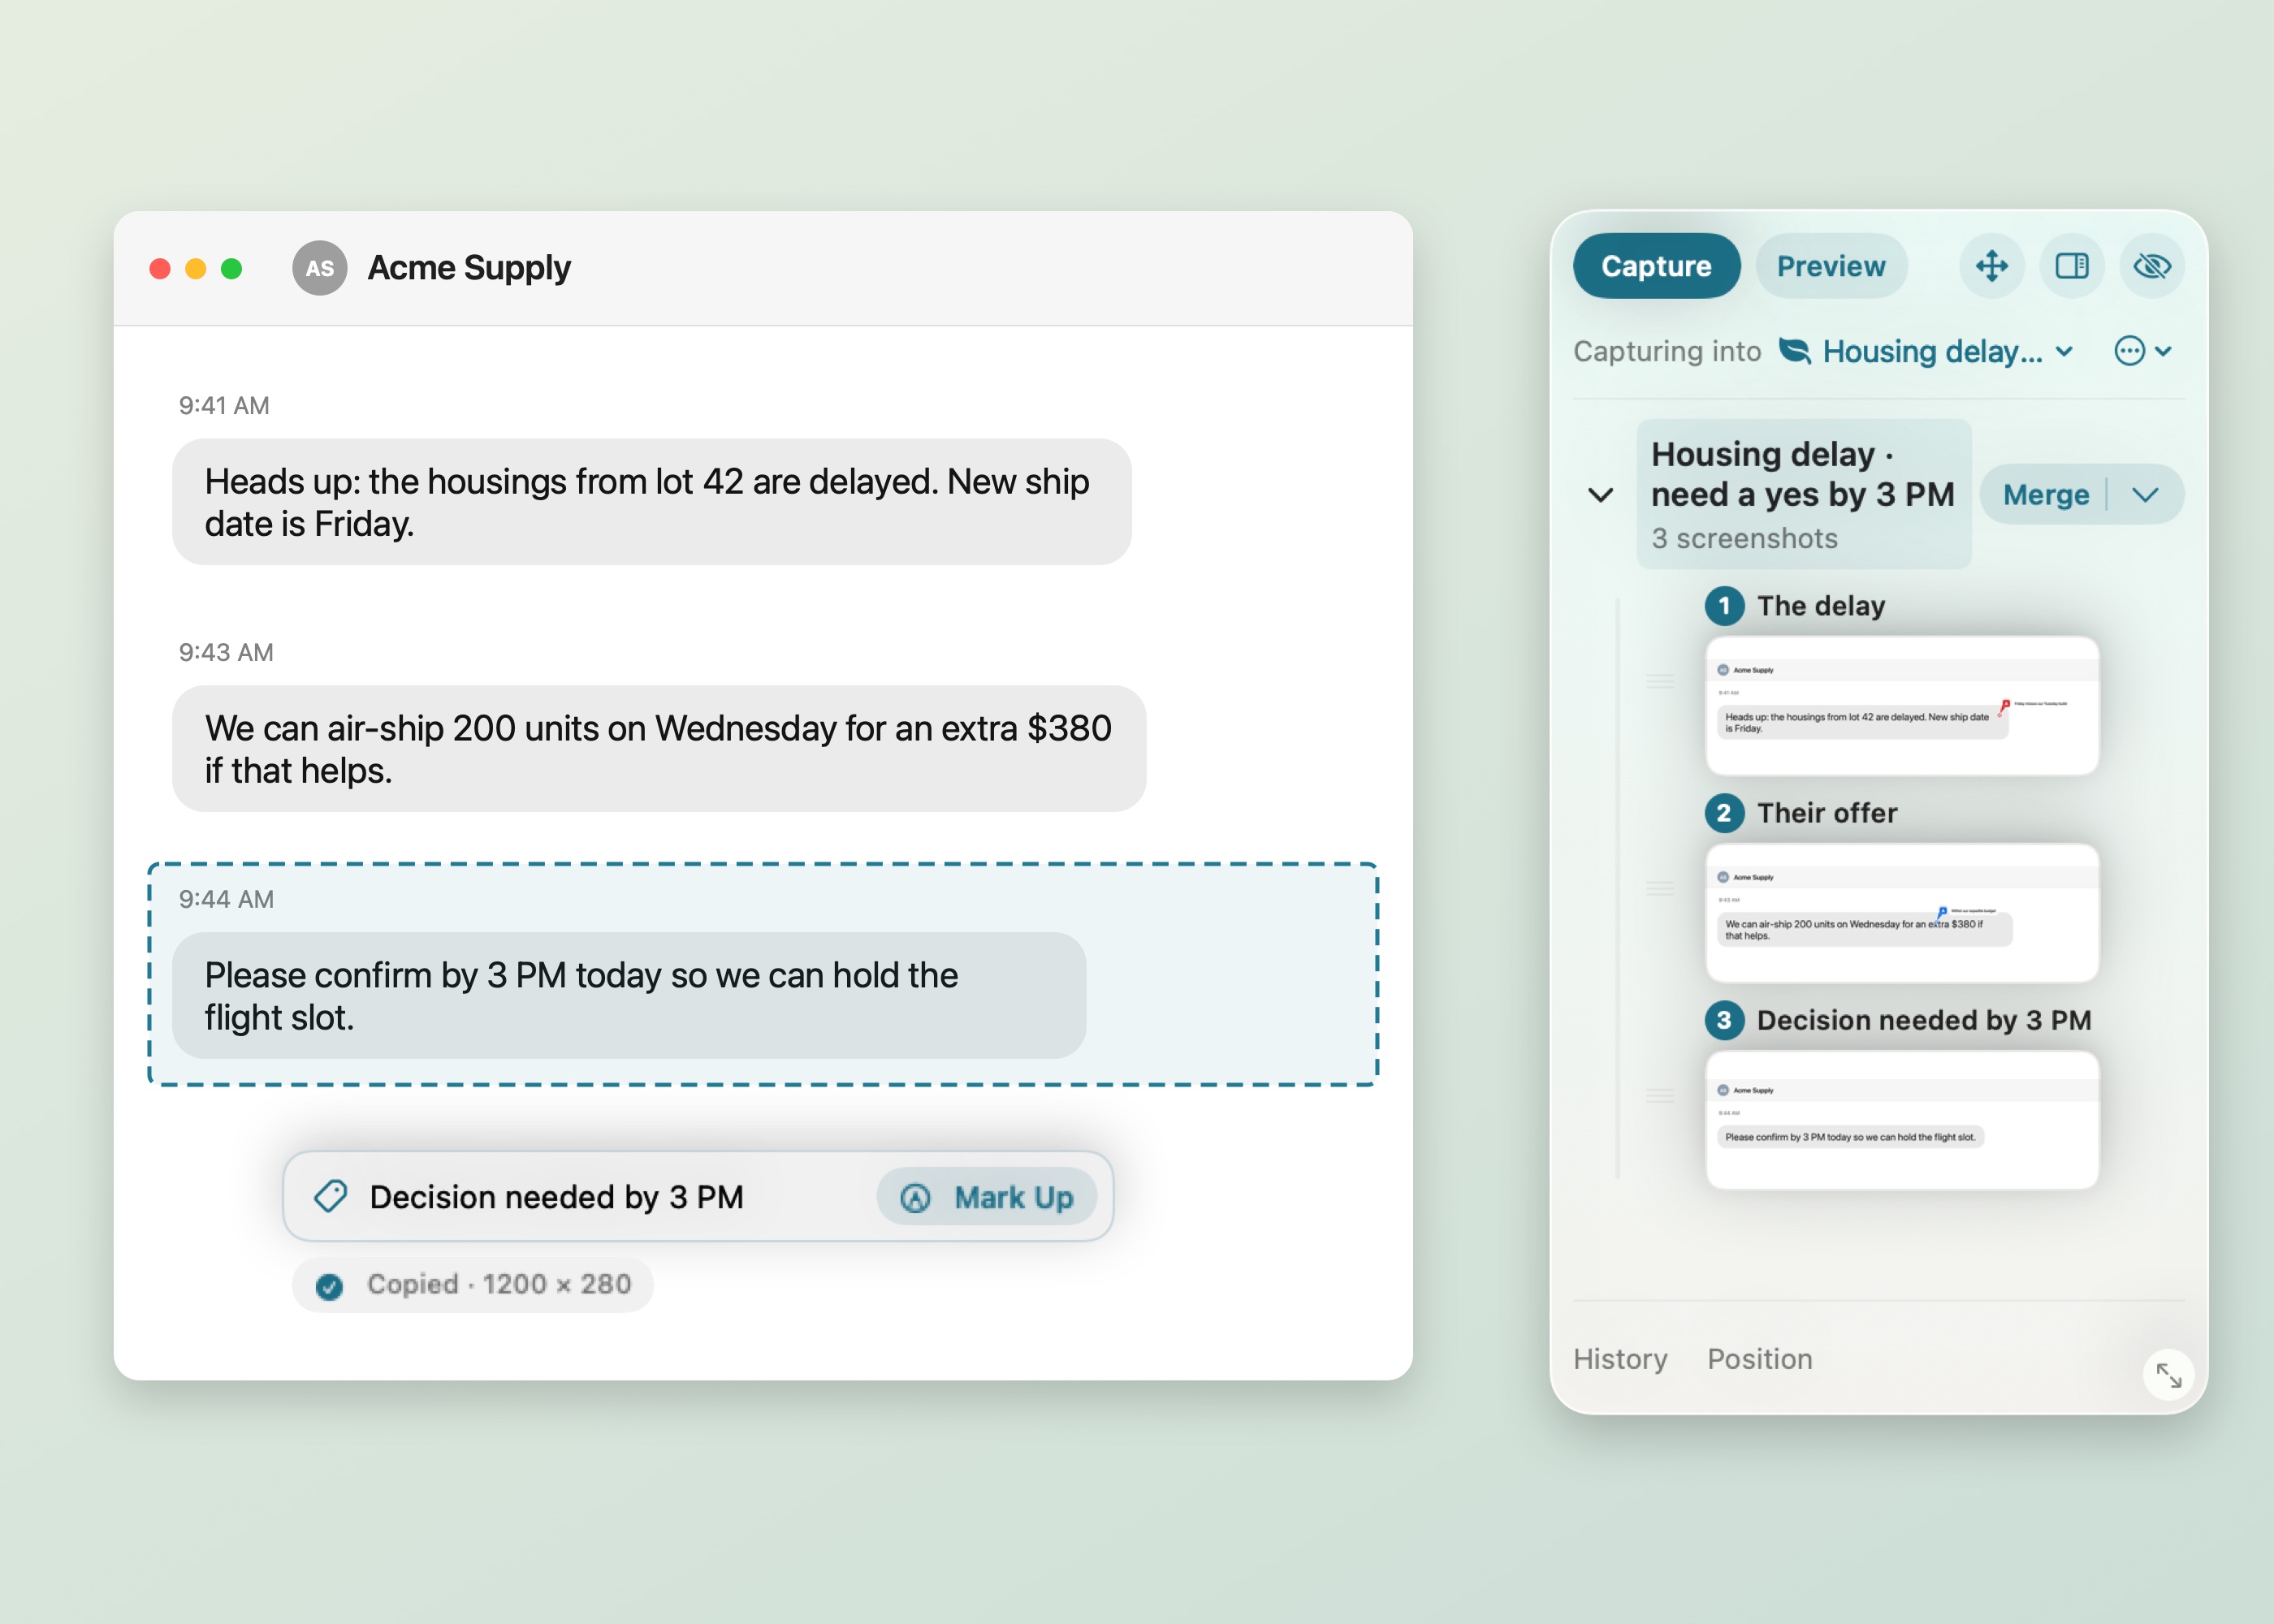
You can turn the automatic copy off with Settings → Copy Each Capture to Clipboard. Screenshots you mark Sensitive are never copied automatically.
Which should you use?
If you copy a screenshot now and then, ⌃⇧⌘4 is all you need. If you’d like every screenshot copied and kept, without a pile of files on your Desktop, SnapTrellis does both.
Sending it to someone? See how to send a screenshot from a Mac, in a text or to your iPhone. Want to add an arrow or a note first? See how to annotate a screenshot on a Mac.
Free to download. Capturing and copying single screenshots are always included; merging a group is free for 14 days, then $19.99 once. No subscription. macOS 14 or later.